Does your night stand or counter look like this every night? With all the smartphones, iPads and tablets our family have, I decided to buy a 5 port USB charger but didn’t realize the clutter that it will make.
So, today, I’m going to make for you guys, a charging station organizer made of wood.
What we are going to need are 3 pieces of lumber that you can easily find at your local Lowes or Home Depot. I went to Lowes and bought me 2 pieces of 2 inches x 1/2 inch x 2 feet finished Poplar Wood and a 6 inch x 1/4 inch poplar project board. For a total cost of $7.10 cents. Now, I don’t have a table saw and I don’t saw straight, so I will need a miter hand saw, power drill, combination square, tape measure, wood glue, and half inch brad nails. I will put in the description below the materials and tools that I used for this project.
So, let’s begin by measuring the cuts. I decided on 8 inches length for a 5 stand organizer. I’ll also include below the lengths and cuts that I used if you want to follow what I did .. but, you can change the dimensions and measurements to your liking.
We have the top part…now we need to cut for the other parts.
We are basically making a box so we need to cut 8 inches for one side
and another one for the other side.

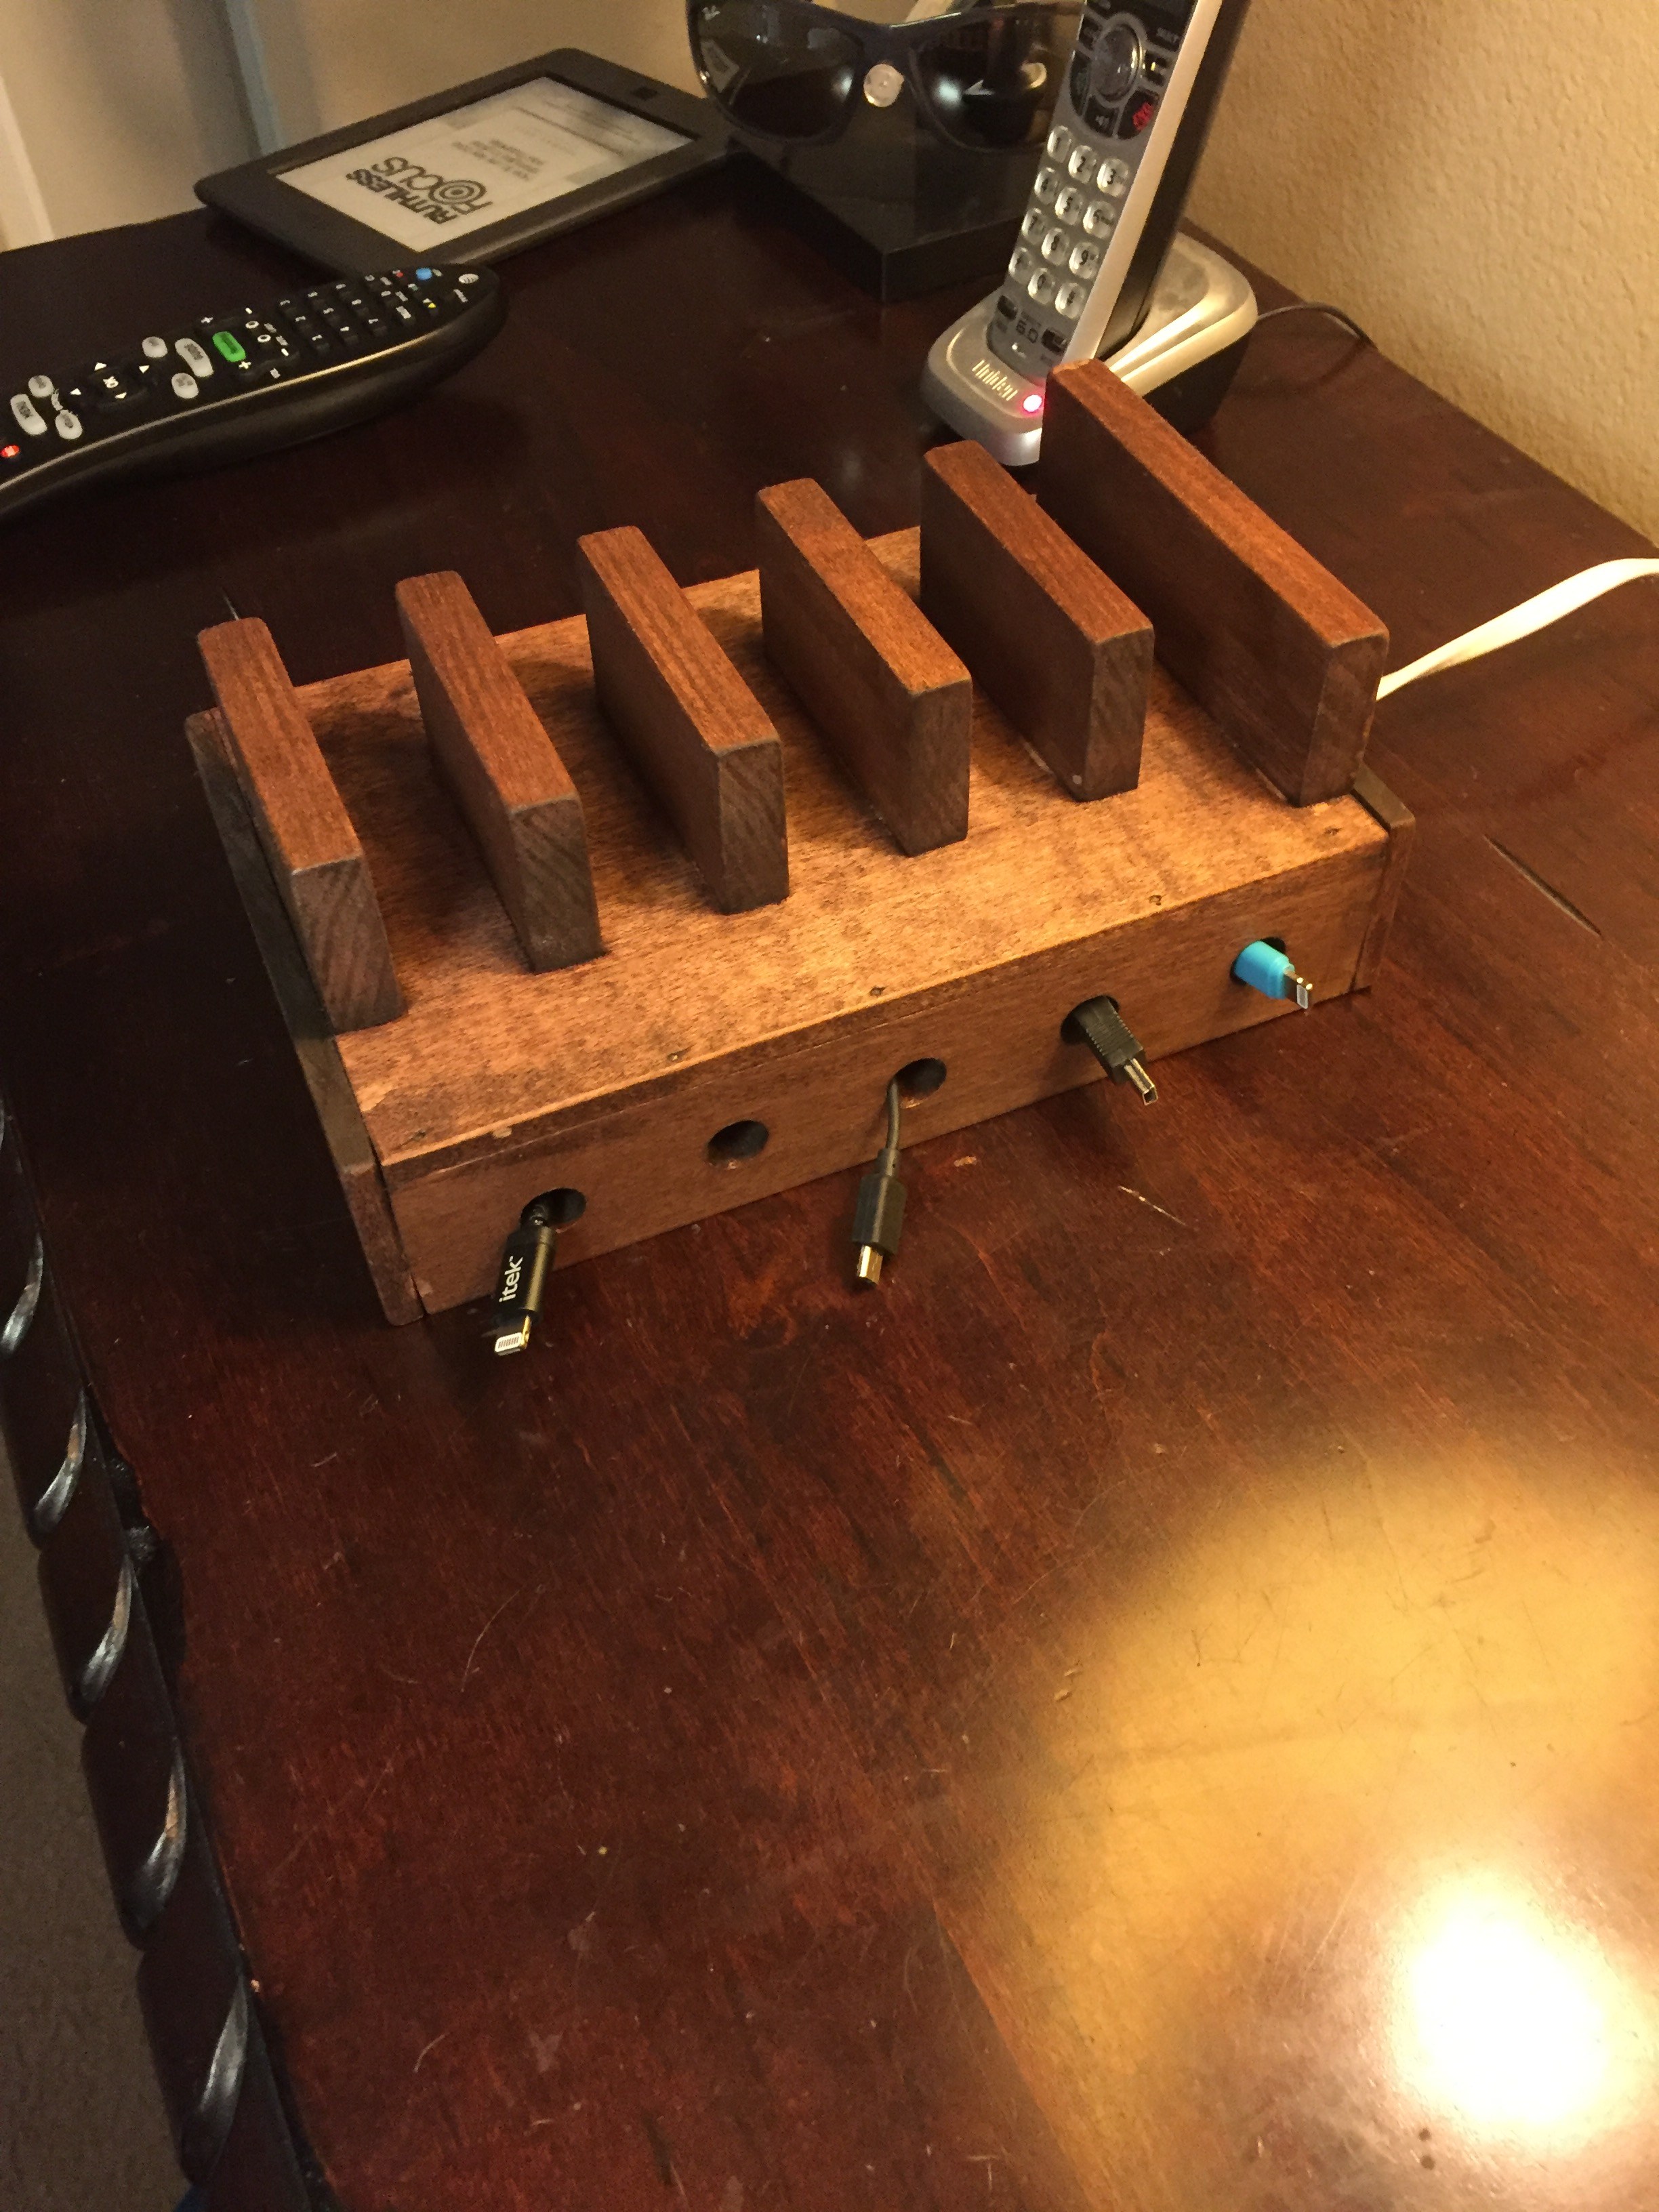
Now, we need to cut holes for our charger wires…so I will need to drill 5 holes. Make sure that the holes are big enough for the wires to go through.
Now, let’s do some assembly. Put some wood glue and nail it down using half inch brad nails. You might noticed that I drilled holes on both sides. Well, I decided to put vent holes on the other side so I drilled smaller holes on that side.
Now, let’s cut for the front and back of the stand and we will set them aside because we need to cut and nail down the stands first before closing the box.
We will need 6 stands and I’ll cut 5 of them 3 inches and one 4 1/2 inch that I will put in the back…more support for bigger iPad.
Now, we need to mark the spacing in between the stands. With an 8 inch overall length and 6 1/2 inch stands, if my math is correct, it will roughly give us an inch spacing in between stands… starting from the back, we can nail and glue in our 4 1/2 inch stand. I also started nailing in to mark every inch so as to easily place and position the remaining stands.
Then, all we need to so is line up the stands up and start hammering them down. As you can see, we are almost done.
Next step is to hammer down the front and back parts. Put a bead of wood glue and nail them in. Then do the same on the other side.
Then it is time to sand. Sand it smooth to prepare it for painting or in my case, I have left over stain from a previous project…So I’ll stain this dark mahogany.
Before staining, I forgot that I need to drill a hole on the back side for the power cord to go through to my USB charger.
Now, we are ready for staining. I’m going to let the stain soak in for 15 minutes and will wipe it off.
There you have it guys, the finished product… my charger station stand that cost me $7 dollars in materials. If you want to add in the paint, glue and nails..It will still be less that 10 bucks and is definitely more durable than the plastic or even the bamboo ones that are selling online for 40 to 50 dollars..
It is time to hook it up and see how it looks in my night stand…just need to unplug this mess..
hook up my USB charger like so, then plug all the USB cables.
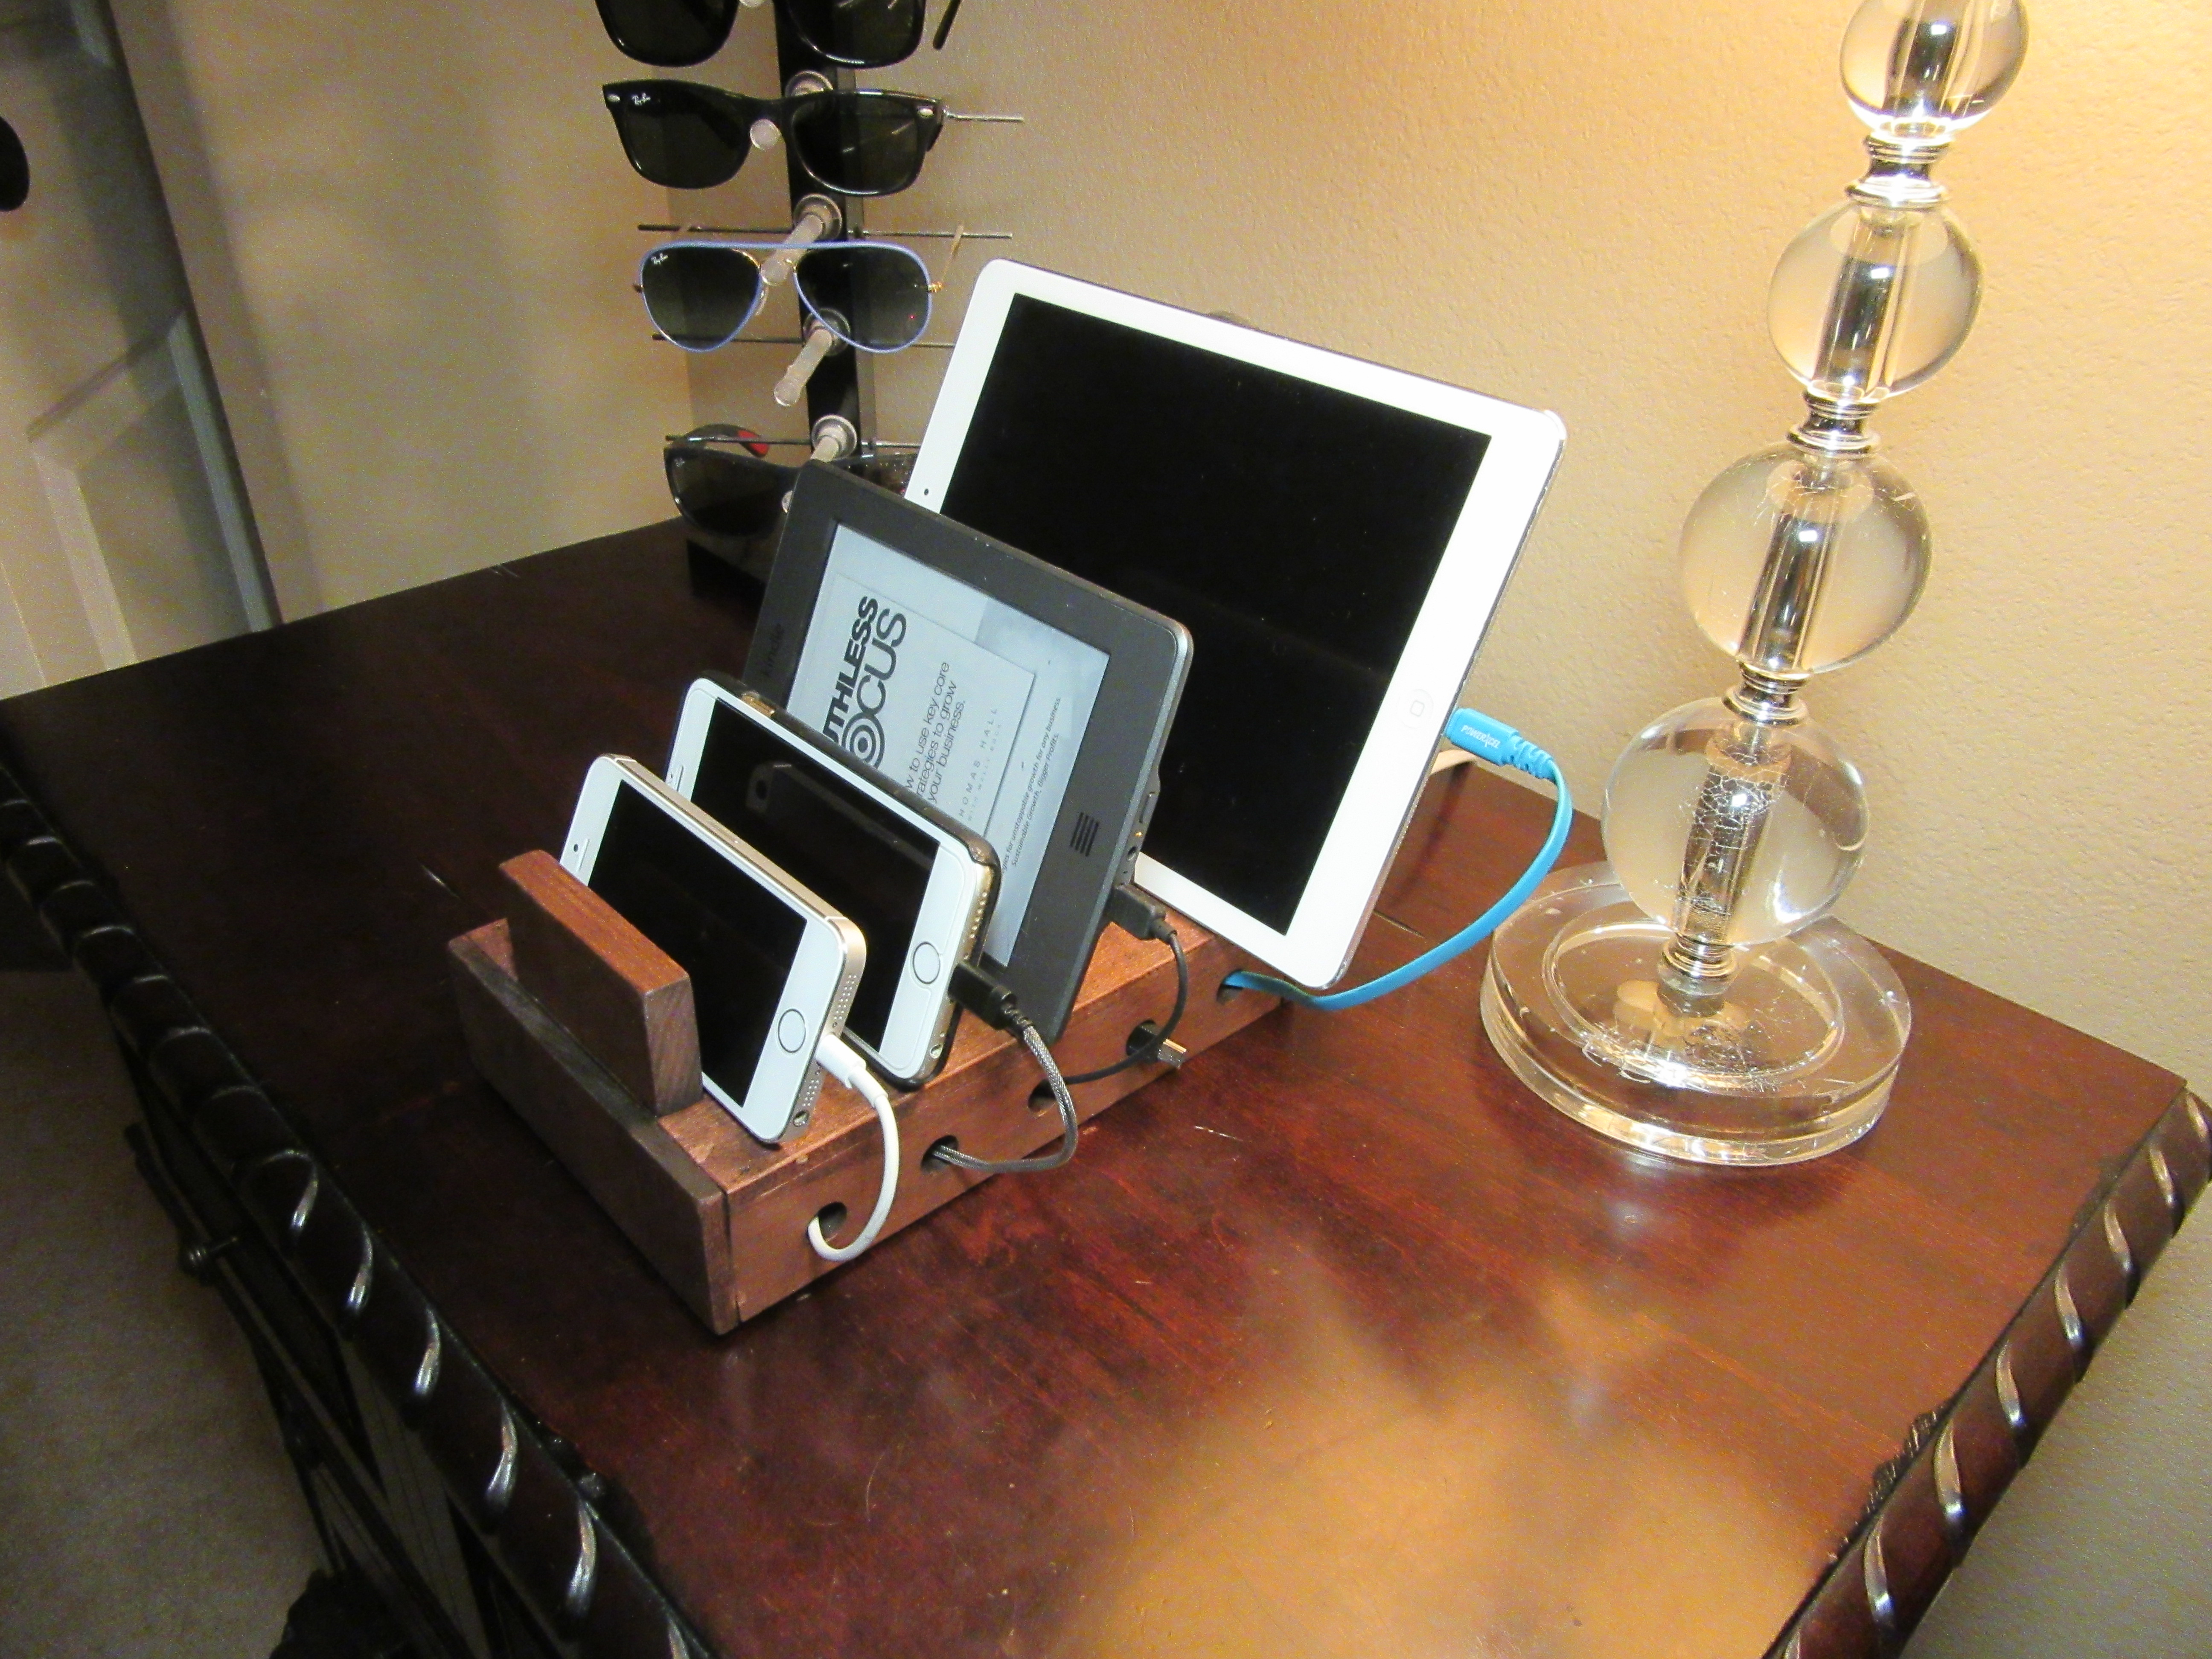
What I like about this is that you can push the cables in if you don’t want to use it. Now let’s hook up the phones…I got my phone here…and my kid’s…my kindle..oops wrong cable and my Ipad..I have to put this other cable in for my kindle…
Ok, this is how it looks like all hooked up..as you can see, no more clutter and if you are not using the cable, you can just push it in and pull it out when you need it. Aside from mismatched color cables, it looks pretty good. And the stain of the charging station matches my night stand.
From this to this….
This is how it looks like underneath when I organize the cables a bit. I also put a double sided velcro so that the charger is attached to the base.
This is how it looks like when no phones are charging..see you can push in the cables..less clutter.