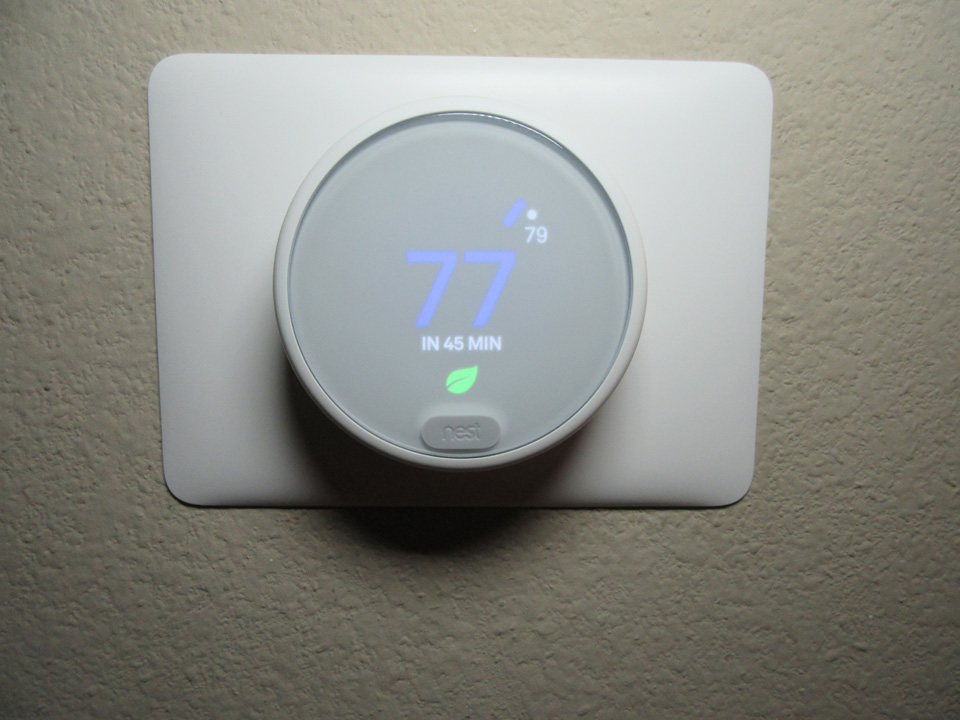
Today, I received my Nest Thermostat E… this is the latest offering from Nest and this is the cheapest model they have which is around 75 dollars less than the orignal nest thermostat.
The Nest E has the same features as compared to the more expensive model except that it doesn’t tell date, time or weather. It has the learning feature, home/away assist and the green nest leaf which helps you save energy.
just like the other model.
It has a frosted display which tends to blend in with your wall and not stand out like the other one. It is made of polycarbonate which means plastic and has a ceramic feel finish. Currently, the only color option is white.
compatibility link
The Nest thermostat works with most 24 volt heating and cooling systems. Before you plan on buying, you have to make sure that your system is compatible and will work with the Nest E.
So, first thing you need to do is to turn off your AC and open up or remove the front face of your current thermostat to show the wire connections.
Take a picture of it and go to nest.com/works and i’ll include the link on the description down below.
This is the compatibility checker and follow through the links and it will say that if you have stranded wires or it is connected by wire nuts and if your thermostat is labeled 110 or 120 volts then this thermostat is not going to work. It only works on 24 volt thermostats. If you pass that then look at your wire colors and labels from your old thermostat. You can select which wires are hooked up to which labels. So, on mine I have Green, Yellow, White, Red…click continue and it will tell you if it is compatible or not.
So, let’s open up the box…
We have here the thermostat itself..some of you might not want the color white but in my case it perfectly will match my light switches and it will not stand out like the silver original one. It has a matte finish on the ring and the front has a clear plastic overlay on the display. The ring turns around and this will be your selector during setup later on.
So, what else is inside the box…we have the installation guide, which pretty much covers everything you need to know on the installation and setup. It also has the wire stickers to label your wires which prevents confusion later on.
We also have the base unit and this is where you are going to plug in your thermostat wires. It has a built in level for easier install and push in connectors so you don’t need to screw in the wires. You can just easily snap on or push in the main unit from the base.
Then, we have the mounting screws..we have 2 of them. These screws have wide threads and are designed to secure the thermostat on a drywall. You don’t need plastic anchors for it.
Lastly, we have a trim plate…If you will have old screw holes that will be visible, this is an easy way to cover it up. I’m pretty sure I will need this on mine. My old thermostat is a bit larger than the nest, so I’m sure I will have holes that will not be covered up.
So, time for installation….First off, we need to turn off power from the breaker box..So, I’ll turn off the AC…
Then we need to pull off the old thermostat so that we will have access to the wires. Then using the stickers from the installation guide, we will label the wires before unscrewing them..
Then, we will unscrew the wires so that we can remove the old baseplate. I just need to tidy up the wires and we will install the Nest baseplate together with the trim plate to cover up these holes.
Then, we just need to secure it by screwing it in with the 2 screws.
We will hook up the wires to their corresponding labels by pushing it in on the connector and making sure that the connector tabs stays down. You can gently tug on the wire to check that they are secure.
After all the wires are securely connected, push them down flush so that you can attach the main unit. Push it in and snap it in place.
Turn the breakers back on and the Nest Thermostat E will turn on and will be ready to setup.
It is not touch screen..so to select an option, you need to turn the outside ring and push the front label to select.
Select your language
Connect to the internet..you need to put in your password
Choose your location
And it will go through all the other options so as to setup your thermostat correctly.
Then you can choose if you want an auto schedule or a basic one to start off. The auto schedule is the one that the thermostat will learn from you so you have to basically teach it by setting the temperatures manually in the next several days. I’ll choose the basic schedule for now..so setup is done.
To control your thermostat through your phone, we need to download the Nest app.
We need to log in or setup an account if you haven’t done it yet.
Type in your address…
If you want to use the Home/Away Assist feature which uses your phone’s location for the thermostat to know if you are at home or not click ok…This is basically help with energy saving that when you are not home, then the thermostat will go to eco mode.
Select the plus sign to add the Nest thermostat E to your nest account. You will need to type in the generated key from the thermostat to link your Nest account so that you will be able to control it from your phone.
When everything is linked then you will be able to see and control the settings of your thermostat on your phone.
You can change the temperature by pushing the up and down arrows..
On the upper right corner is the settings, you have the Home/Away Assist if you want to use your phone like geofencing..when you leave, then the thermostat will automatically set to eco temperatures which I already set..62 degrees for heat and 80 degrees for cooling.
We have the auto schedule which the thermostat learns your behavior and creates a schedule to match your heating and cooling preference.
We have time to temp – which estimates how long it will take you to reach your set temperature.
We have early on – which the thermostat will automatically start earlier so as to get to the set temperature on the scheduled time.
Cool to dry – which runs your AC a little bit longer so as reduce the humidity inside the house.
We have sunblock which senses if your thermostat is in direct sunlight and will adjust the temperature accordingly.
We have the leaf…which comes up when you adjusted the thermostat to an energy saving temperature.
We have the airwave which the fan will turn on a little bit longer to circulate the air after the compressor turns off…
Down here are the eco temperatures..these are the temperatures that I set when nobody is at home at the house.
We also have a fan schedule where you can schedule just the fan – this is separate from the AC to run everyday.
Wifi connection which I need to go to the thermostat and can change the settings over there.
Equipment just gives you information from the setup what type of HVAc unit I have..and there is also a filter reminder so that I will not forget to change the filter. I know I changed mine last month So ,I’ll set it up like that.
We have the safety temperatures which the thermostat will turn on if it reaches these threshold. I will stick with the default temperatures on this one.
There is also a lock option where you can lock your thermostat on these range of temperatures…so nobody can lower or raise up the temperature without your pin code. I’ll set mine to 76-81.
Now, on the bottom of the main screen are the quick shortcuts just like on your regular thermostat… we have the switch control here for heating or cooling, eco temperatures and off.
On the fan, it is like a timer if you want just your fan to turn on..for 15 or 30 mins.
We have the schedule here..if you want to schedule the thermostat manually. Just tap on a day of the week to go to that day…
Press and hold on the temperature…move up/down while continuing to hold to change the temperature..side to side to change the time. Takes some practice with my stubby thumb..
Then if you want to have the same temperature and time settings across the board..you can copy that and paste it to the other days of the week. I’m going to tweak and change these later on or use the auto-schedule learning method so as to get more energy savings. This is why I bought this thermostat in the first place to save money on electricity.
Also this Nest thermostat can be controlled by Alexa or amazon echo devices. You just need to search for Nest on Alexas’ skills and enable it. Both your Nest account and Alexa account will be linked. Click accept and close the window and discover devices…you then see the Nest will be added. Let’s try it out.
Overall, the thermostat is easy to install. Setting up is a little bit long. You have to setup the thermostat by itself first then add it to the app..by then you can tweak and change the settings on the app. This is one of those that you set it and forget it…but what I’ll be looking at is the energy history so that I’ll know if my AC is running efficiently or not. So we will see how it goes.
The thermostat’s display is usually off..it just blends in the wall until you get closer then it will turn on..The Nest thermostat E is priced at 169 dollars…75 bucks cheaper than the regular nest thermostat..Now, it is more affordable and will compete with a lot of Wifi thermostats out there.